
- News
- Women
- Magazine
- IndustryIndustry
- InsightsInsights
- Success Stories
- PublishPublish
- ContactContact
- Media KitMedia Kit

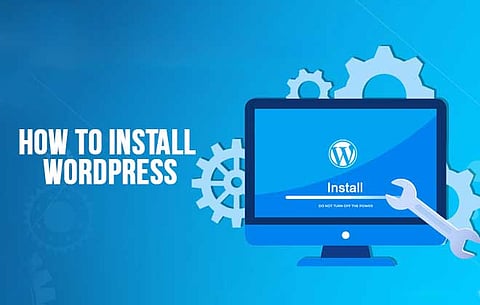
How to Install WordPress
The Complete WordPress Installation Guide

WordPress is free, open-source software that enables over 30 percent of online users to self-host and design their own websites. When WordPress was first launched it had several users but over time grew into the most popular CMS in the world. Present-day, WordPress is powering over 75 million websites. And its installation is increasing rapidly.
In this WordPress guide, you will find everything you need in order to create a website with WordPress. There are two main ways to install WordPress on your hosting server, manually or with the help of software.
First, we will get through the WordPress manual installation process, it only takes a few moments and to install it, you do not need to have programming knowledge.
Here, we assumed that you have got your web hosting account and ready to start building your website.
First of all download the latest version of WordPress from its website. Save the file to a location on your computer system.
Once you are done with downloading the zip file to your computer, now you need to upload the files to your hosting account, namely to your public_html folder.
In case, you have more than one domain linked to your hosting account, make sure to upload the file to the right directory.
Here, you can upload the files by using an FTP client like Filezilla or by using File Manager in cPanel. Both ways work just the same for uploading your .zip file.
Through File Manager
File Manager is created with multiple tools and it is accessible from virtually any web browser.
From cPanel, you need to click on File Manager
Access the directory you want to use by clicking, "public_html."
If you are in the correct direction, just click on the "Upload" option in the toolbar.
Now click on the "Select File" option to upload the .zip you downloaded from WordPress.org. After upload, click the "Go Back to…" link at the bottom.
Now you can choose the WordPress file and click on the "Extract" option in the toolbar. You can easily select the file by clicking it once with your mouse.
A new window will appear that will ask you where you want the files extracted to. Here, you need to leave the default directory that is shown. And click the "Extract File" button in order to unpack the .zip.
Because of how the .zip file is set up, you can see a "WordPress" folder in your directory. You need to move the contents of this folder to continue the installation properly.
If you don't move the files, your site will be located at http://www.example.com/wordpress so replace it with your domain.
Click on the "WordPress" directory to show its field, Use double-click to do this.
Select all of the files and click "Move".
Again a new window will open for moving all the feels and folder. Here, you need to remove the "WordPress" part of the directory. It will be at the end of the path. If you have one domain name, your file path will look like "/public_html//".
When the files are moved, give a click to the "Up One Level" button to return to your site's directory.
It's time to create a database on your hosting account. With this, you will be able to save the data required for the website to function.
From the cPanel dashboard, click on the "MySQL Database Wizard" tool.
Now, give your database a simple & easy name and click on the next step.
Now, choose a username and password to connect your WordPress website to the database.
When you are doing, click on the "Create User" button.
In the next step, you will assign privileges for this account. Click the "All Privileges" checkbox.
Scroll to the bottom and click on the "Next Step" button.
Finally, your database is ready for WordPress to use it. Make sure you have copied down your database name, user and password correctly.
At this stage, time to set up your blog. To do this, head over to http:://www.example.com/wp-admin/install.php. In case, your blog is in a subdirectory and then go to http://www.example.com/subdirectory/wp-admin/install.php instead.
The first screen is a language selection window. Select your primary language and click on the "Continue" option. Generally, English is the default language as per the WordPress version.
In the next screen, you will get a screen telling you the elements you will need to know before installing WordPress. Click the Let's Go.
Install your database name, username and password. Leave the database host as localhost. It works with most of the web hosts. (In case, localhost does not work for you, get the info from your hosting provider).
If you do not plan to run multiple installations of WordPress in a single database, leave the "Table Prefix".
Note down the prefix to your database name and username. Generally, it starts with the primary account name. It looks like "acountname_"; it is visible when you set up the database.
After entering the information, click on the submit button.
On the next screen, you need to click the "Run the Install" button to continue.
Now, fill the admin information like the title of the site, the admin username, password and your email address.
Note down your username and password, you will need them in future to manage your site.
Now click the Install WordPress button once you are done with the information.
Finally, you have set up your site, now click the Login button and start creating content.
The easiest way to install WordPress is to choose a host that does installation work for you. While there are many solutions for auto-installers. We will provide you guidance on how to Install WordPress on Hostinger quickly and easily:
First of all, log in to your cPanel and locate the Auto Installer under the Website section
Now, click on the WordPress icon, provide all the information and click on the Install button
And, that is, your WordPress site is ready. Now you log in to the administrator dashboard by selecting WordPress on the actions field under the list of Installed application and start creating your website.
As we know that by default, WordPress displays in the US English language. ? This platform is versatile and can accommodate language from across the global. This is surprising but true that there is a special WordPress Contributors that do a job of translating the platform in multiple languages.
You can easily localize WordPress by installing the language files and update your wp-config.php file. Another way is to navigate to Setting-General and scroll down to the bottom of the page.
Localizing WordPress is not possible if your language is not fully translated. Now, you need to add your language files.
For this, you need to open your wp-content directory and create a new folder called languages. Now, upload the .mo and .po language file. To get these language files, go to the Translate WordPress on Make. WordPress.org, and click on the Details link next to your language. On the next page, download your language pack.
Keep in mind that you can only download language packs that have a GlotPress score of 100%. Now move to the next step, down the language pack, extract the archive and upload all the .mo and .po files to /wp-content/languages/.
Now, open our wp-config.php file and add the link given below:
1 define('WPLANG','fr_FR');
Here, you need to replace fr_Fr with your language and country code. For example, if you want to use Brazil spoken in Hindi, you would use BR_Hi. You can easily find your WordPress locals codes under the WP locales column on the Translate WordPress Page. Save your wp-config-PHP file and you are ready to install WordPress in your own language.
This is all about how to install WordPress manually and through the automatic installer. After finishing this guide, you have learned how to install WordPress easily.
We hope you have found this tutorial helpful.
Have you already installed WordPress? How was your experience? Do you have any question or doubts? Let us know in the comment section below.
Follow us on Google News


